Polygel nail extension is a difficult process that requires skill, accuracy, and attentiveness from the master. But if you wish, you can organize it even at home. Detailed step-by-step instructions from professionals will help you with this.
Features:
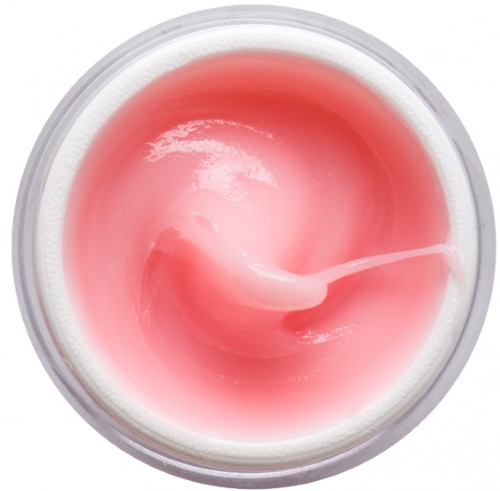
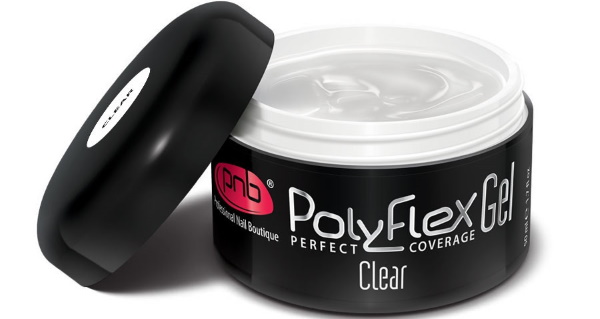
The material discussed is a hybrid of gel and acrylic. Initially, manicurists had to mix them by hand, carefully choosing the proportions. But now such a tool can be bought ready-made, which greatly facilitates the work.
When preparing a polygel, a high-quality construction gel is mixed with a minimum amount of acrylic powder. It turns out a tool resembling plasticine in consistency.
The main features of the material (in descending order of importance):
- The process of nail extension takes place without a pungent aroma (unlike pure acrylic), and after treatment with a lamp, the plates become very dense and do not break (unlike the usual gel). The material does not cause allergies and is suitable even for people with asthma.

- The polygel is easily leveled, and the remnants of the product are instantly removed and can be used further. As a result, the time spent on the entire build-up process is significantly reduced.
- Initially, the material was intended exclusively for work with upper forms. But today it is successfully used to build up the lower ones. Interestingly, the product is laid out in almost the same way as acrylic. Only it does not freeze instantly, but retains its plasticity before being processed in a lamp. The main thing is to properly prepare your nails.
- With correct work with the material, various errors are completely excluded. For example, detachments and "pockets" filled with air. These problems are common with acrylics.
- In sawdust, the material is tougher than gel, but softer than actril.
- Polygel does not lag behind the nails in the free edge.
Without the polygel, it was difficult for the craftsmen to work with the upper forms. When an ordinary gel was placed on them and transferred to a lamp, it began to leak out strongly. And then he could form ugly bumps in the cuticle area that needed to be cut out, which greatly injured the delicate skin. With the new tool, such problems do not arise.
Kinds
Polygel nail extension step by step requires the selection of quality material. There are many options on the market today.
Among all the diversity, two main types of material can be distinguished:
- acrylates;

- products with a gel / jelly structure.
The first option (acrylates) by its properties most of all resembles an acrylic mass. To obtain it, powder and monomer are mixed. In such formulations, you can even notice the minimum particles of acrylic. The material has a pasty structure - thick and dense. To distribute it over the nails, the mass must be pressed against the plate with some effort.
Acrylic technology is most common in America and Europe. Local craftsmen prefer to work with such compositions. Domestic craftsmen often order them directly from the USA or Germany. The second variant with the texture of a thick gel ("soufflé", "jelly") looks different. In the mass you will not find noticeable particles of acrylic.
The main advantage of such products is the ability of most of them to self-align on the nail plates.
Irregularities on the material are easily eliminated during modeling, while it does not flow around the edges.Such formulations are most often produced in Korea and China. They are especially loved by Russian manicure masters. Also on sale there are polygels from different manufacturers. Which one to choose, each master decides on his own, taking into account his own preferences in working with nails.

 Don't miss the most popular column article: Laser hair removal on the face and body - how it is performed, effectiveness, before and after photos, contraindications.
Application master class
Polygel nail extension step by step is a process that may not be immediately clear to beginners. A detailed master class will help you understand all the intricacies. To work with polygel, you always need to stock up on a special degreaser. Sometimes regular alcohol is taken instead. This is necessary so that the material does not stick to the brush and the process of laying out the composition does not hinder.
Today, there are many known ways to use the discussed tool. Most often it is taken for building (both on the upper and lower forms). But you can also use it for the correction of nail plates, their strengthening, prosthetics.
This is permissible, even if initially the building was carried out using gel or acrylic. The materials interact perfectly with each other, so you should not be afraid of detachments. Of course, if the correct preparation of the nails was previously carried out.
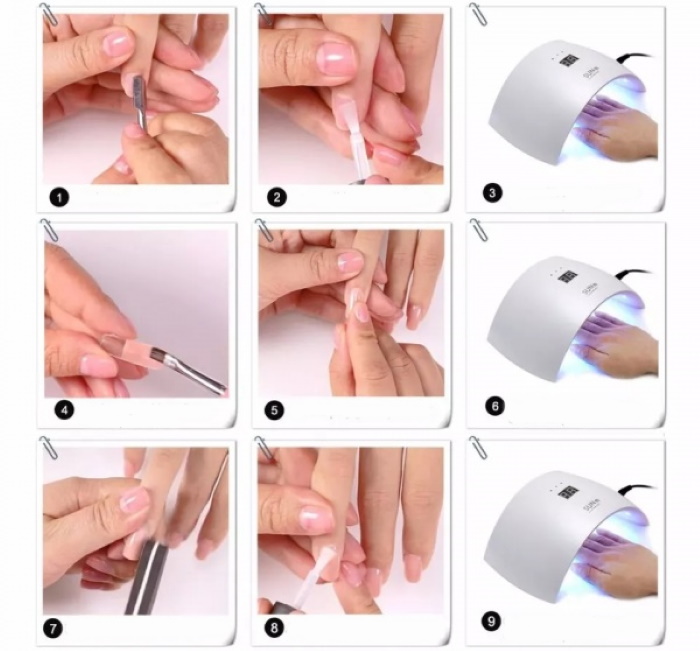
To build high quality nails with a polygel, you need:
- Perform a manicure according to the standard scheme. Let's say both classic and hardware. The main thing is to carefully remove the pterygium at the final stage.
- Treat the entire surface of the nail plate with a degreaser, acid or acid-free primer. The choice of a product for this stage will depend primarily on the degree of moisture in the nails.
- The thinnest layer of base is applied immediately. In this case, it is used not so much for leveling the nail plate, but as an adhesive layer. The base helps to securely fix the polygel on the nails. That is why it is applied with a thin rubbing motion. It is not necessary to straighten her nail and achieve perfect smoothness. It's okay if the plate is slightly ribbed.
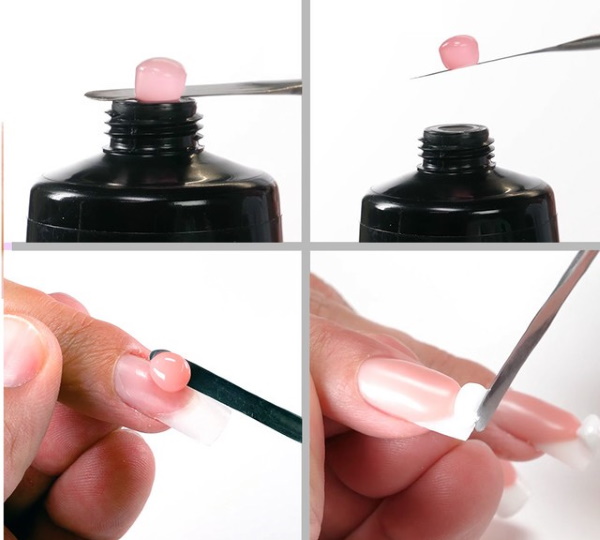
- The base must be thoroughly dried. Only then lay out the acrylate. To do this correctly, you should wet the brush with cleanser or rubbing alcohol, but not too much. Other special fluids are suitable for this stage.
- Blot the moistened brush with a lint-free cloth. It should not come out wet, but slightly damp.
- Using a spatula, squeeze out a small portion of the polygel from the tube. Place it on the nail plate and distribute. This should be done in the same movements as when using the usual acrylic - gently patting the surface. The material is easily stretched to the desired area, for example, to the side ridges or to the cuticle. Therefore, the drop should immediately be placed in the very center of the nail, and only then level it up, down and to the sides.
- Pull the rest of the composition that is no longer needed for work to the tip. Remove them with a brush. You can knead and stretch the material for a very long time until it is fixed in the lamp. Until then, it will remain soft and can be infinitely adjusted. It is best to build up one plate at a time so as not to accidentally touch the neighboring ones and not spoil them.

Polygel nail extension step by step. - Fix the result with a lamp. If a high power hybrid device is used, 30 seconds will be sufficient.
- It remains to remove the sticky layer and cut the extended nails. It is very easy to process polygel plates. The material is soft, plastic. You can quickly achieve the correct beautiful shape of the nail and the ideal smoothness of its surface. Experienced masters advise to process the nail in a lamp for 10 seconds when building up. in a free form, then clamp it with tweezers and continue the process with the entire structure. This will allow you to achieve the correct shape of the plates and a perfectly flat arch.
Polygel is used not only for nail extension, but also for nail strengthening. This process can also be carried out independently, guided by step-by-step instructions. For strengthening with polygel, first prepare the nails as standard. And then - pull the brushes from the cuticle area to the free edge of the plate. This will help you achieve the optimum thickness of your nail.
If the tip of the plate is cracked, it can be restored with a polygel without cutting it low and without waiting for regrowth. The discussed composition can also be used for nail prosthetics in case of fungal infection and in cases where the plate exfoliates, peels off the skin. In this case, you do not need to take forms.
The material is allowed to be applied directly to the skin after preparation - filing, processing with a degreasing compound, removing the exfoliated part of the nail (if necessary). The skin must be treated with antiseptics, which destroy the microbes accumulated under the nails. Next, the material is laid out and heated in a lamp.
Recommendations and advice
Extension with a polygel nail step by step allows you to get a perfect manicure for a long time. But removing the material with a special liquid is possible only in rare cases - you need to choose a special expensive composition. In other cases, it will only have to be removed with a file / ceramic cutter.
You can not be afraid that direct sunlight will fall on the jar with polygel. The material is able to freeze only under the lamp. The bank can be safely kept open for the required amount of time.
When working with a polygel, you do not need to use special separate brushes. Those that were bought for acrylic or regular gel are also suitable. For a uniform, dense coating, one thin layer of the composition is usually sufficient. Therefore, the tool can be called very economical.
Don't miss the most popular column article: Morning exercises for those over 40, 50. Gymnastics exercises for weight loss, video tutorials.Rating of the best funds
A detailed table will help the master to decide on a suitable polygel for nail extension. It contains the best modern tools.
| Name | Features: |
| Grattol | The texture is enamel, dense on 1-2 layers. On sale you can find 5 shade options at once. Among them: beige in different tones, camouflage, peach. There is an option with sequins. Sold in miniature packages of 30 ml. Very economical to use. After filing the material, it is recommended to sand the coating with a buff (soft) to prevent the appearance of ugly white dots |
| Bluesky | The texture is enamel. Different density levels can be selected. Coral, purple is also found in a wide color palette. The minimum tube volume is 8 ml. But you can find on sale and packaging 60 ml. Such a polygel does not stick to the brush, therefore it does not require processing the accessory with a special liquid. This is one of the few similar formulations that can be removed with a gel polish remover. The composition has a special fine-grained structure that prevents small bubbles from forming. |
| Tnl | The thermoplastic agent is thick and very easy to use. Available in 11 different shades. The texture is enamel. Density - translucent. With a sticky layer. Sold in 18 ml tubes. It takes 1 to 2 minutes to dry the coating, depending on the selected lamp. To work with the composition more conveniently, it is worth using a reusable extension form. |
| Patrisa nail | The texture of the composition is enamel. The density can be chosen - translucent or dense composition. Various shades to choose from. There are camouflage and beige in different tones. This is a high-quality but expensive product. Sold in tubes ranging from 30 to 60 ml. |
| Tertio | The texture is enamel. The product is sold in 3 density options - translucent, dense in 3-4 layers, dense in 1-2 layers. Another inexpensive tool. Sold in tubes of 30 ml. Available in different shades: white, camouflage, milky pink. The material is not capricious to the bristle of brushes.It can be used when working with both natural and artificial accessories. |

All of the listed compositions differ among themselves not only in basic properties, but also in price. So, at the same time, budgetary and very high-quality options include, for example, Tnl, the cost of a tube is 350-400 rubles. But for a small tube of Patrisa Nail, you will have to pay about 1 thousand rubles. Today, if you wish, you can build up nails even at home.
The easiest and most convenient way to use a polygel for this purpose. This is a new unique product that combines all the positive features of both acrylic and gel. The main thing is that it does not have an unpleasant smell, and the particles to be cut off are heavy and quickly settle on the table without flying through the air. Step-by-step detailed instructions will help to understand the features of the process.
Article design:Lozinsky Oleg
Video about nail extension with polygel
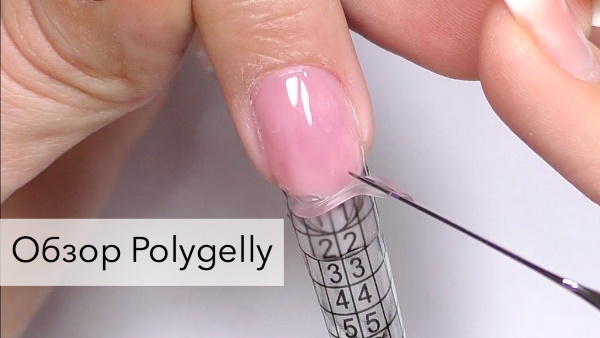
Polygel nail extension, overview:
Hello, please tell me why, when building on top forms, the form is not removed from me, but together with the polygel the dam sticks to the nails.
after drying. on both sides, press down on the nails
I have the same question, the top form cannot be removed.
Poorly dried in a lamp. After drying, do not immediately remove the form, let it cool slightly, then the form can be easily removed. Good luck!