Every woman should look 100% not only her body or face, but also her arms, legs - especially nails. Nails should be well-groomed and clean - not only in terms of hygiene, but also aesthetics. Recently, fashion trends offer women, girls and even little ladies to create an extraordinary manicure with a ribbon for design.
Among the many options for nail design, it is worth paying attention to tapes for nail design. The design of a photo of the phased use of different types will be offered in several versions.
What is nail design tape?
Tape for nail design is a metallized tape in a reel of different widths, lengths, colors and shapes. An adhesive coating is applied to the back of the tape, with the help of which the tape is attached to the nails.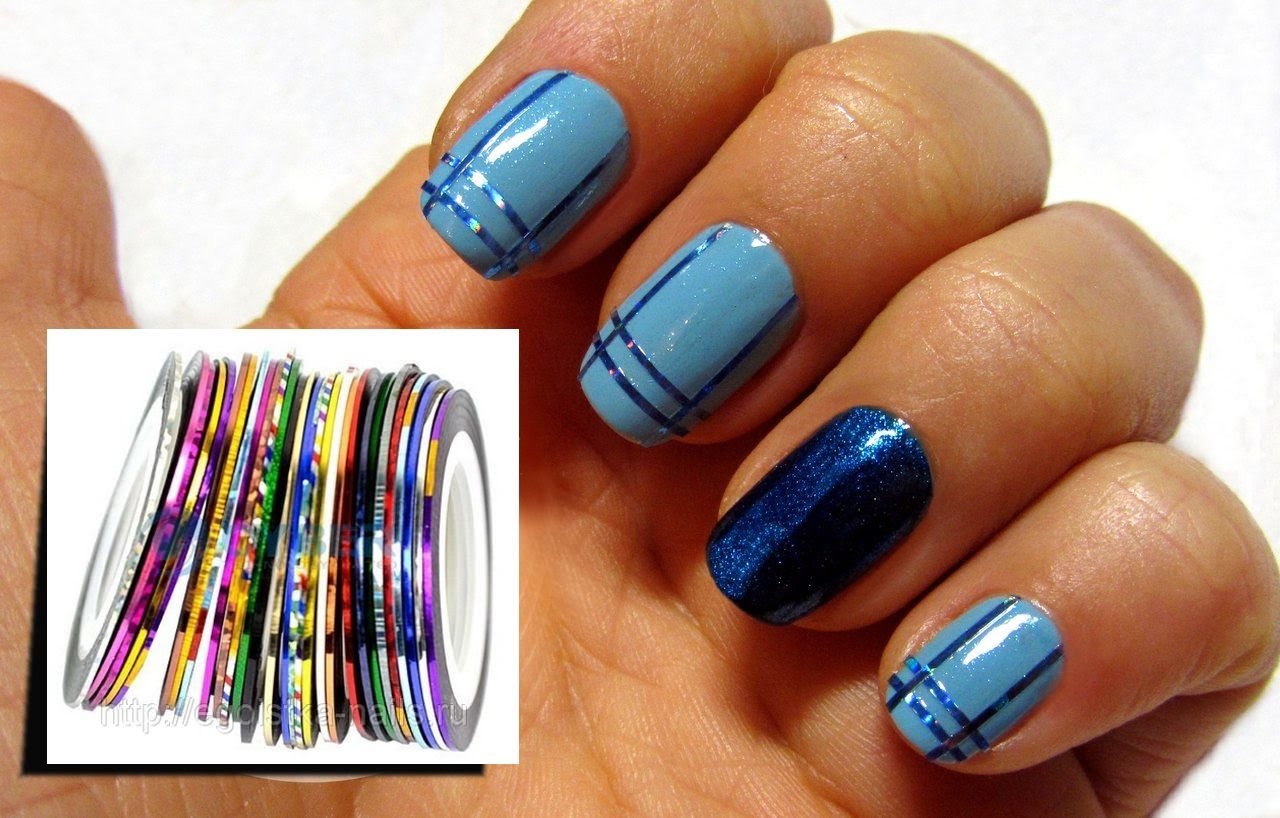
Such a tape is used in nail design, in any manicure and with ordinary nail polish, with acrylic coating, for gel polish... The main rule for using it is that the nails must be dry, then the tape will hold tight and lie flat, photo of the design.

 Don't miss the most popular column article: How to draw monograms on nails step by step for beginners. Instruction with photo.
Benefits of using tape
The main advantage of tape for design is a huge selection of shapes, colors, widths, thicknesses.
As well as:
- The price of the tape is low, you can at least buy a package of different tapes at once;
- Ease of use, even an inexperienced person can handle it;
- Creates a beautiful, sophisticated nail design;
- May be stored for a long time - without using, it takes up little space;
- Retains its appearance for a long time;

Nail design with tape for short and long nails. Photos, ideas with rhinestones, scotch tape. Master class: how to make a manicure with gel polish - Helps in creating straight lines if you have difficulty drawing them on your nails.
Working with such a design, there are many more advantages that every woman will highlight for herself.
Two options for using tape in manicure
First of all, tape for nail design is a decor that is used to create and highlight a pattern on the nails, a specific color of the tape.
When creating an aquarium design in the form of a 3-D effect, it is performed in several stages:
- Apply one layer of gel to match the nail plate, glue several tapes on top, dry;
- Apply a transparent gel, crumble the cut tape or strips on top, but in the other direction, dry the nails under the paw;
- Apply another layer of clear gel.
- A beautiful 3-D manicure with ribbons is ready.
The second use of ribbon is as an auxiliary design element. It creates various geometric and other shapes on the nails and removes the ribbons with tweezers.
Nail design with tape (+ photo)
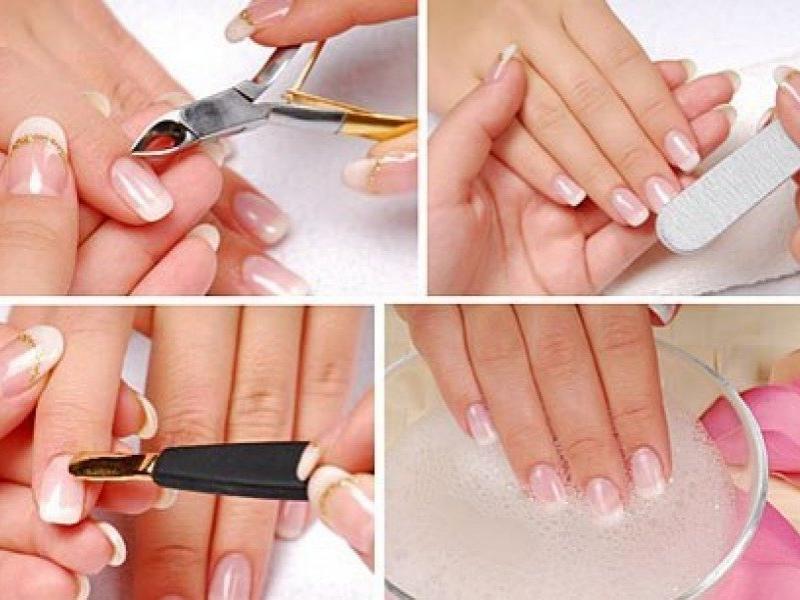
For nail design with tape requires preparation of hands and nails for manicure:
- Make a bath for hands and nails;
- Wipe your hands dry;
- Apply hand cream;
- Remove the cuticle with a wooden stick;
- Trim and trim nails to the required length;
- With a nail polish remover, degrease the nail plate;

- Apply varnish, acrylic or gel polish;
- Dry thoroughly;
- The surface of the nail plate should be flat;
- Glue the tape according to the sketch of the future manicure drawing, stretching its edges and pressing tightly;
- Apply transparent varnish and fixer on top.
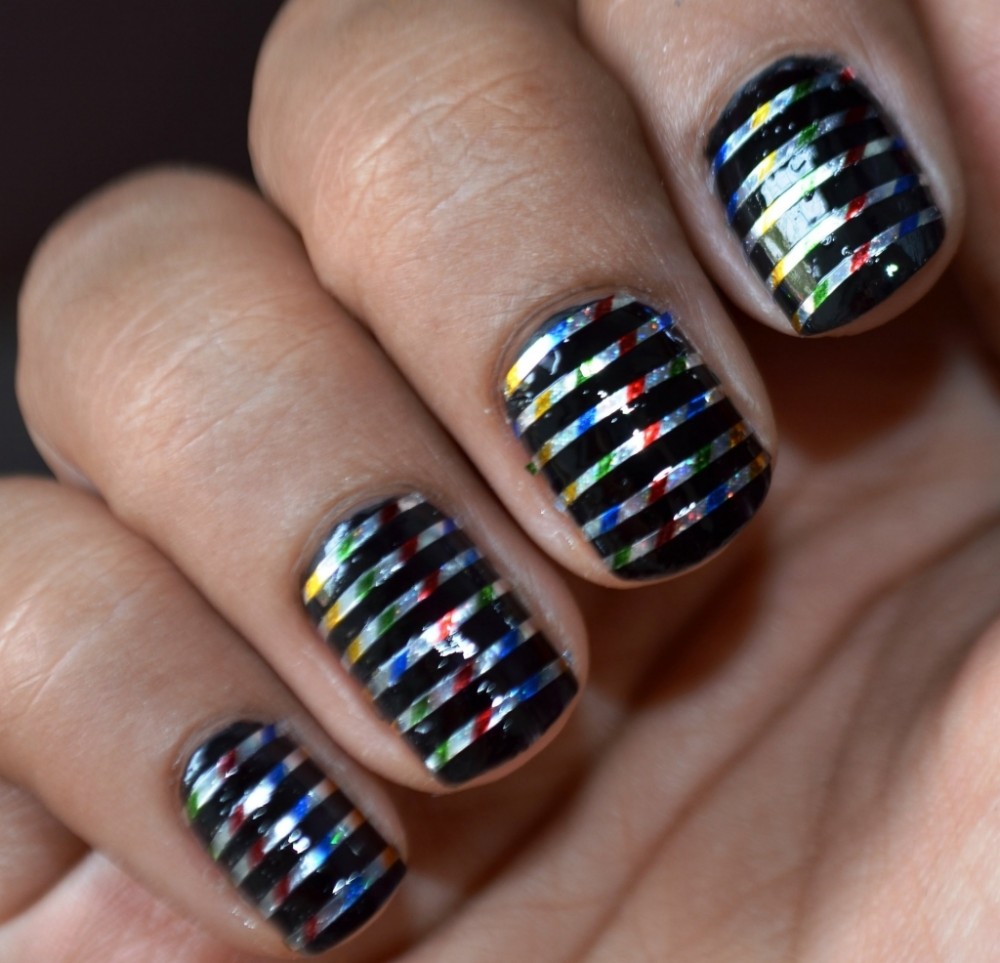
Where to begin? The easiest option for a tape manicure is "zebra":
- Choose a thin black or white ribbon;
- Apply nail polish (gel, acrylic). If the tape is black, then the varnish is white and vice versa. You can use other colors, but so that they are contrasting;

- Glue the tape in 2-3 rows for short nails, and 3-5 rows for long nails. Optionally, ribbon decor is additionally carried out - with rhinestones, stickers;
- Cut off the remnants of the tape;
- Apply clear varnish;
- Dry thoroughly.
Moon manicure
Fashion trends are constantly changing, but every woman wants to be in trend from the top of her head to the tips of her nails. One of the fashion trends in nail art is moon manicure.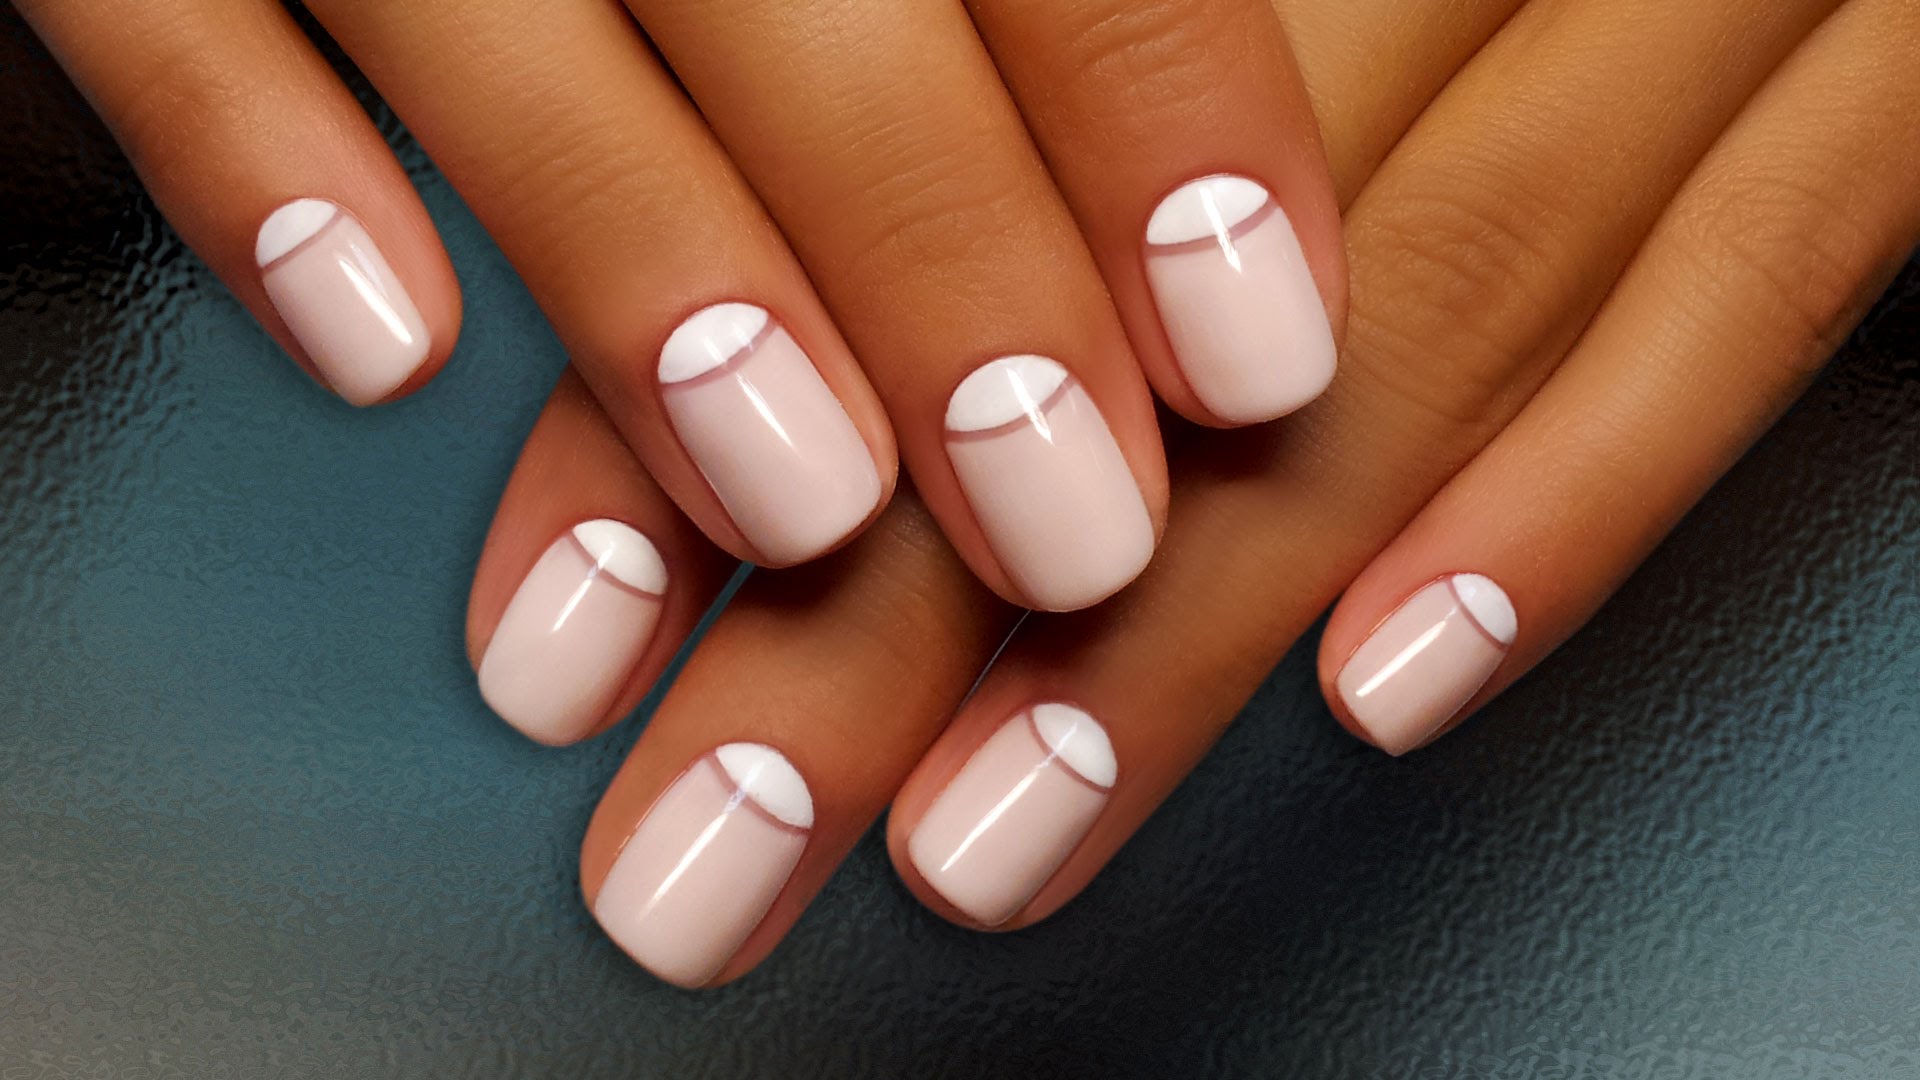
What is a moon manicure? It is quite easy to recognize it, the base in the form of a "crescent" stands out on the nails, but some create a square or triangular, double selection with ribbons, in combination with a jacket. There are many ideas, everyone chooses in accordance with the event: for an everyday or special occasion.
For everyday moon manicure, a design in white and pink tones with a gold or silver ribbon is suitable, as in the first photo:
- Prepare hands and nails for manicure;
- Apply the base in the form of white varnish;
- Dry white varnish;

- Apply pink varnish on the upper part of the nail and dry;
- Fasten the golden tape;
- Apply a colorless varnish on top of the manicure.
It is possible to create such a manicure with one polish color (second photo):
- Apply colorless varnish to the nails, dry it;
- Fasten the tape;

- Apply white varnish to the upper part of the nail, dry;
- Apply a transparent fixer on top.
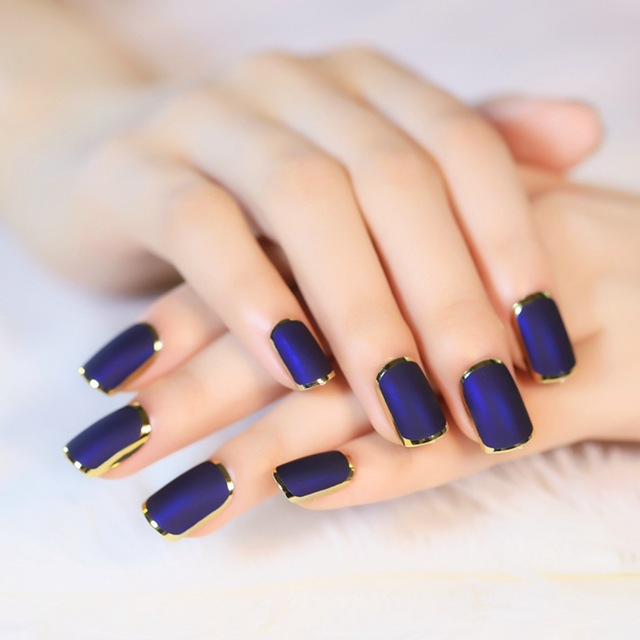
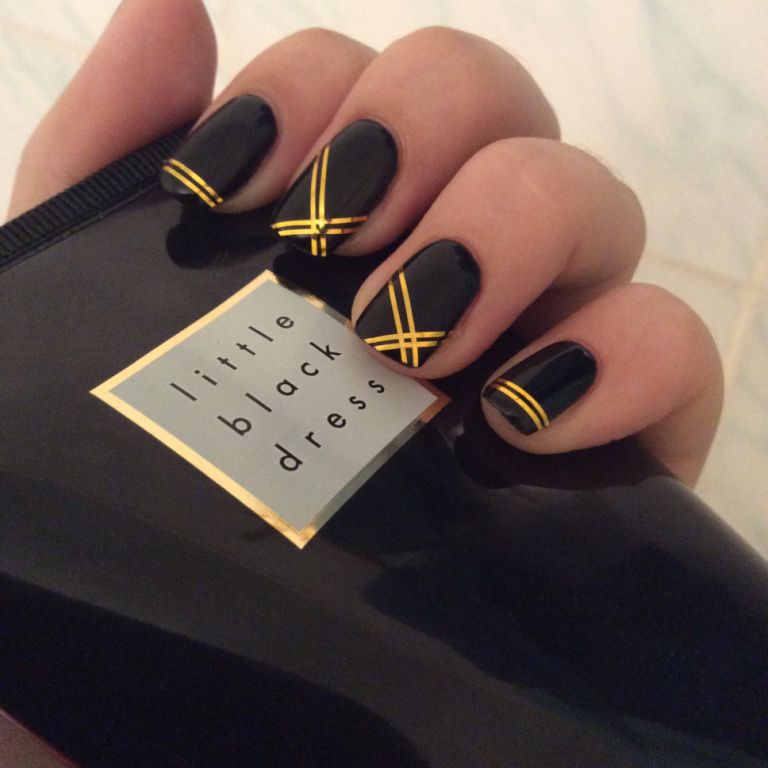
Black with gold
Black is not only sadness, but also the color of creative personalities, and manicure in the form of black varnish with a gold ribbon or vice versa is a refined and elegant classic. Such a manicure on nails will look rich and luxurious.
It will take several steps to create such a nail design using tape (design photo):
- Black varnish (gel, acrylic), gold tape, colorless fixer;
- Clean nails and remove cuticles;
- Apply black varnish (gel) to dry nails, dry under a lamp;

- Glue a gold tape: lengthwise, across, obliquely or create a cell and rhombuses from them, perhaps imitate a moon manicure - glue a gold tape on a black varnish at the base of the nail. The design depends on the woman's unlimited imagination;
- Apply fixative, dry nails again.
Whip up ribbon design
At home, quickly create a manicure design using tape on nails, many options with a design photo.
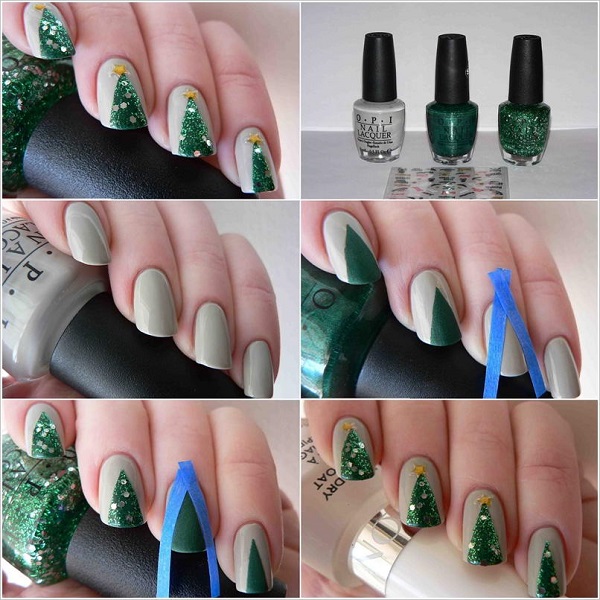
1st option - "Herringbone":
- Prepare hands and nails for manicure: wash, clean, file;
- Choose a varnish. In our case - white;
- Cover your nails with clear varnish or gel;
- From the base of the nail with tweezers, glue the tape in the form of a triangle without a base or in the form of a tick, so 3 rows are created;

- Top the entire nail with white varnish;
- We dry the varnish under the lamp;
- With tweezers, remove the tape, removing it by the protruding tails along the edges of the nail;
- After removing the tape, apply transparent varnish, dry the nails.
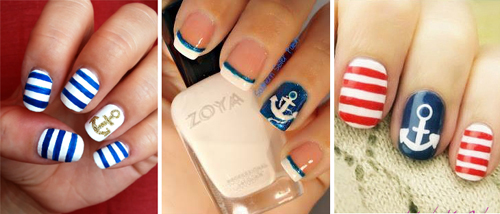
2nd option - "Sailor":
For such a manicure, we select the colors of the tape and varnish in accordance with the marine theme: blue, blue, white, coral, silver.
- We completely cover the nails with white or coral varnish;
- Dry your nails under the lamp;
- We glue a blue or silver tape across the nail in several rows, depending on the length of the nail;

- Cut the edges of the tape with scissors to the very base of the nail;
- Apply the finishing fixer and dry your nails.
3rd option - "Oblique lines":
In such a manicure, the tape plays an auxiliary role, for an even distinction between colors.
- Apply light pink varnish, dry your nails;
- We glue the tape obliquely at the base of the nails;
- Paint over the upper part of the nail with varnish 1 tone darker than the previous one, dry it and remove the tape;

- On top of the second layer of varnish, closer to the center of the nail, at the same angle, glue the second tape;
- We paint over the edge of the nail above the tape with varnish 1-2 tones darker than the previous one, dry it and remove the tape;
- Apply transparent varnish to all nails and dry the nails under the lamp.
Each of the options presented takes from 40 minutes - quickly and beautifully.
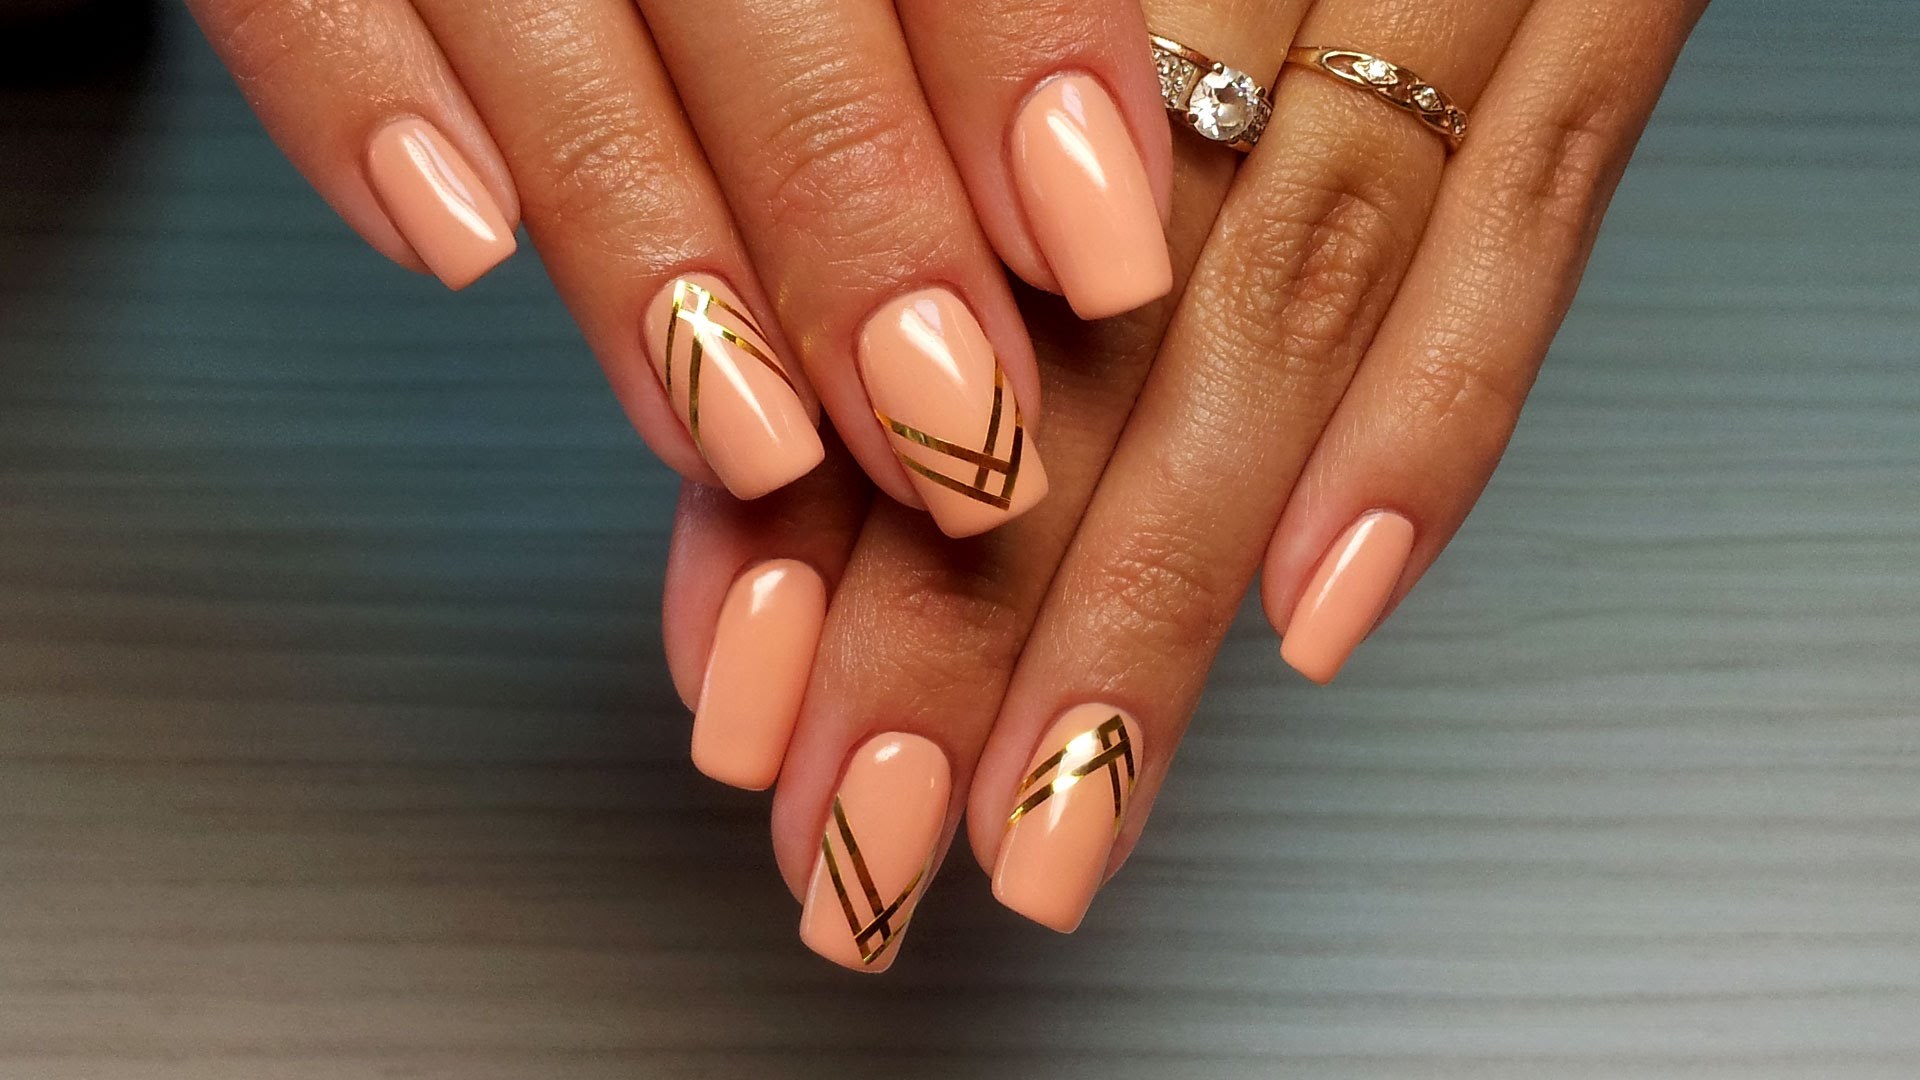
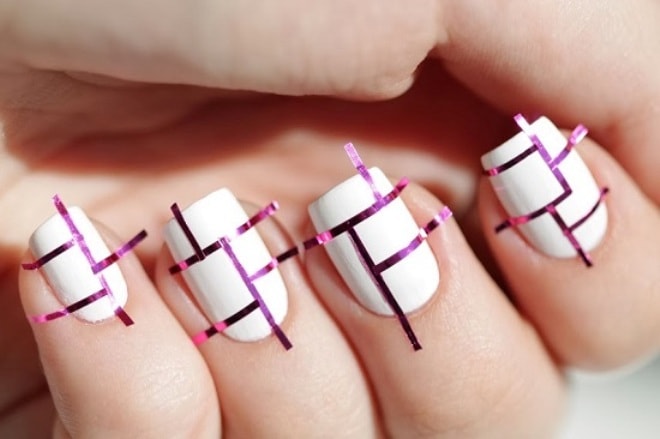
Geometric ribbons patterns
The most beautiful manicure with ribbons - creating geometric shapes for nail design - is easy and simple.
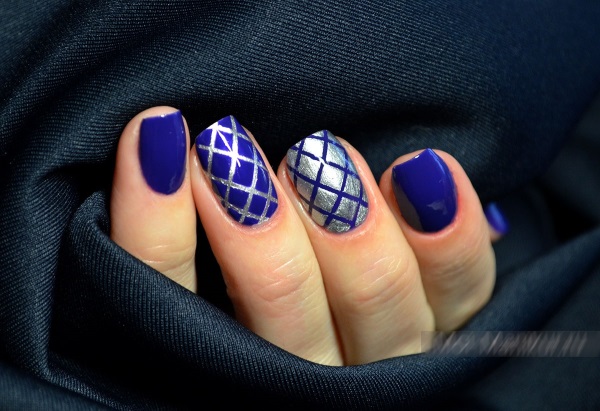
1st option - "diamonds":
- Cover nails with blue varnish, dry;
- Glue the tapes obliquely to one side of the nail, and then in the opposite direction over the first tapes;
- With a cosmetic sponge, apply lightly blue or white varnish over the tapes;

- Dry your nails and remove the tapes, first those that were glued with the last layer;
- It turns out on the nails - rhombuses. Decorate the nail with rhinestones, beads.
If you want to make a large rhombus, then this will require 4 ribbons. 2 are glued so that a triangle forms at the edge of the nail and 2 more so that an acute triangle forms at the cuticle.
Then you can cover the entire nail with a different color and remove the ribbons or paint over the formed rhombus in the center of the nail. If you leave the rhombus in the form of ribbons, then the edges must be trimmed so that they fit the nail tightly and secure with transparent varnish.
2nd version of manicure - "spider":
- Apply golden varnish to the nails, dry them;
- Cross with glue tape so that the intersection of the cross is in the center of the nail;
- On 4 sides of the nail, glue the tape with an angle, so that the angle looks at the center of the nail;
- Apply black varnish on top, dry and remove the tapes, first - corner, then - cross;
- Apply a colorless varnish on top, dry it.
This option is possible in various matching colors, in order to choose matching colors, you can use the "modern color wheel of Goethe".
3rd version of geometric shapes - "multi-colored triangles":
- Apply a beige or pale pink varnish, better to match the skin;
- On the dried varnish we glue 3 tapes obliquely from the bottom of the nail to its outer corner, parallel to each other, in the same way, glue another 3 tapes in the opposite direction;

- After the applied tapes, triangles form on the nail, which are painted with multi-colored varnishes;
- Dry the nail and remove the tapes, apply a colorless varnish on top.

4th option:
- Cover nails with pink varnish and dry;
- Glue 2 tapes from the center of the edge of the nail, obliquely to the cuticle;
- Glue two tapes so that it separates the outer edge of the nail;
- We take 2 more tapes, one edge, each of the tapes should be glued inside the first triangle closer to the tape, which separates the edge of the nail;
- The 2 inner ribbons must cross - with a cross, so that a rhombus forms between the 2 corners (outer and inner);
- After the applied tapes, paint the nail with a varnish of a different color, different from the main one, for example: coffee color and dry;
- Remove tapes and apply fixer.
Don't miss the most popular column article: How to build up your nails with gel polish. Instructions for nail extension for beginners. A photo.Striped frappe
Women who like the taste of coffee or coffee drinks can indulge themselves with one of the trendiest, stylish, understated designs in the "Striped Frappe" style. It perfectly combines shades - beige and brown.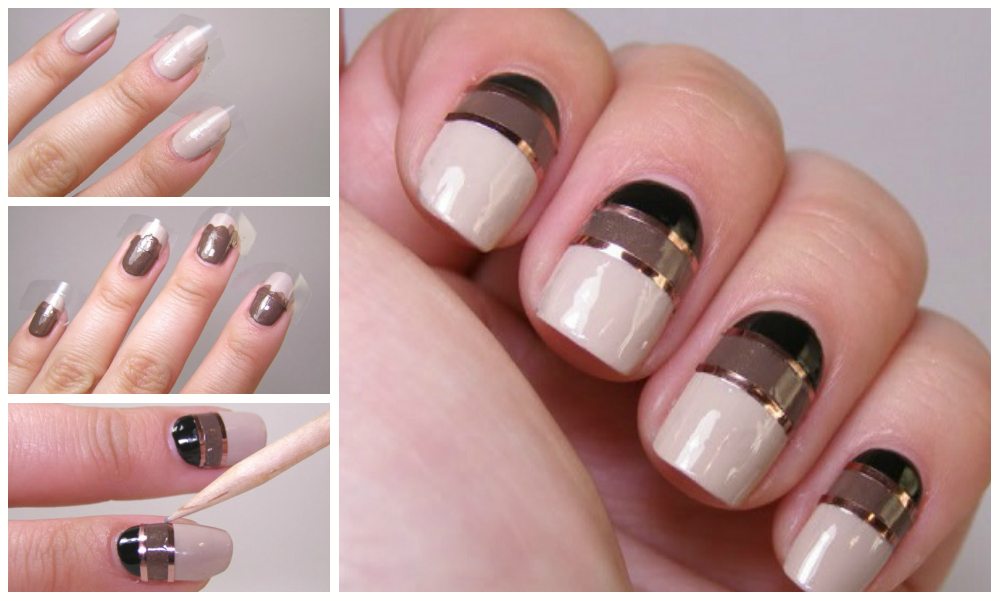
You can combine these colors and their shades with the help of water and liquid tape, then a design in the form of intricate patterns, similar to coffee foam, is formed on the nails (design photo).
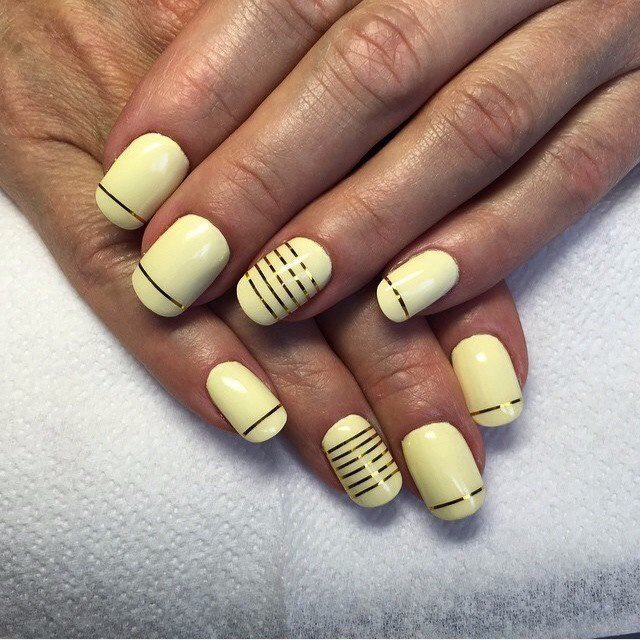
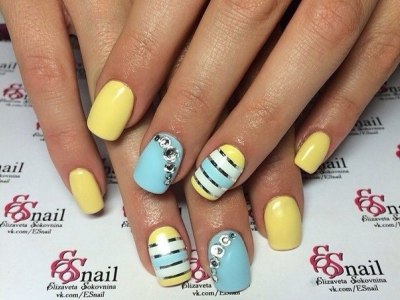
Smooth, straight lines are made using ordinary tapes for nail design. Dividing the nail along, across, obliquely, in the form of geometric shapes.By adding touches of black lacquer, rhinestones, beads, beads and additional designs as decor.
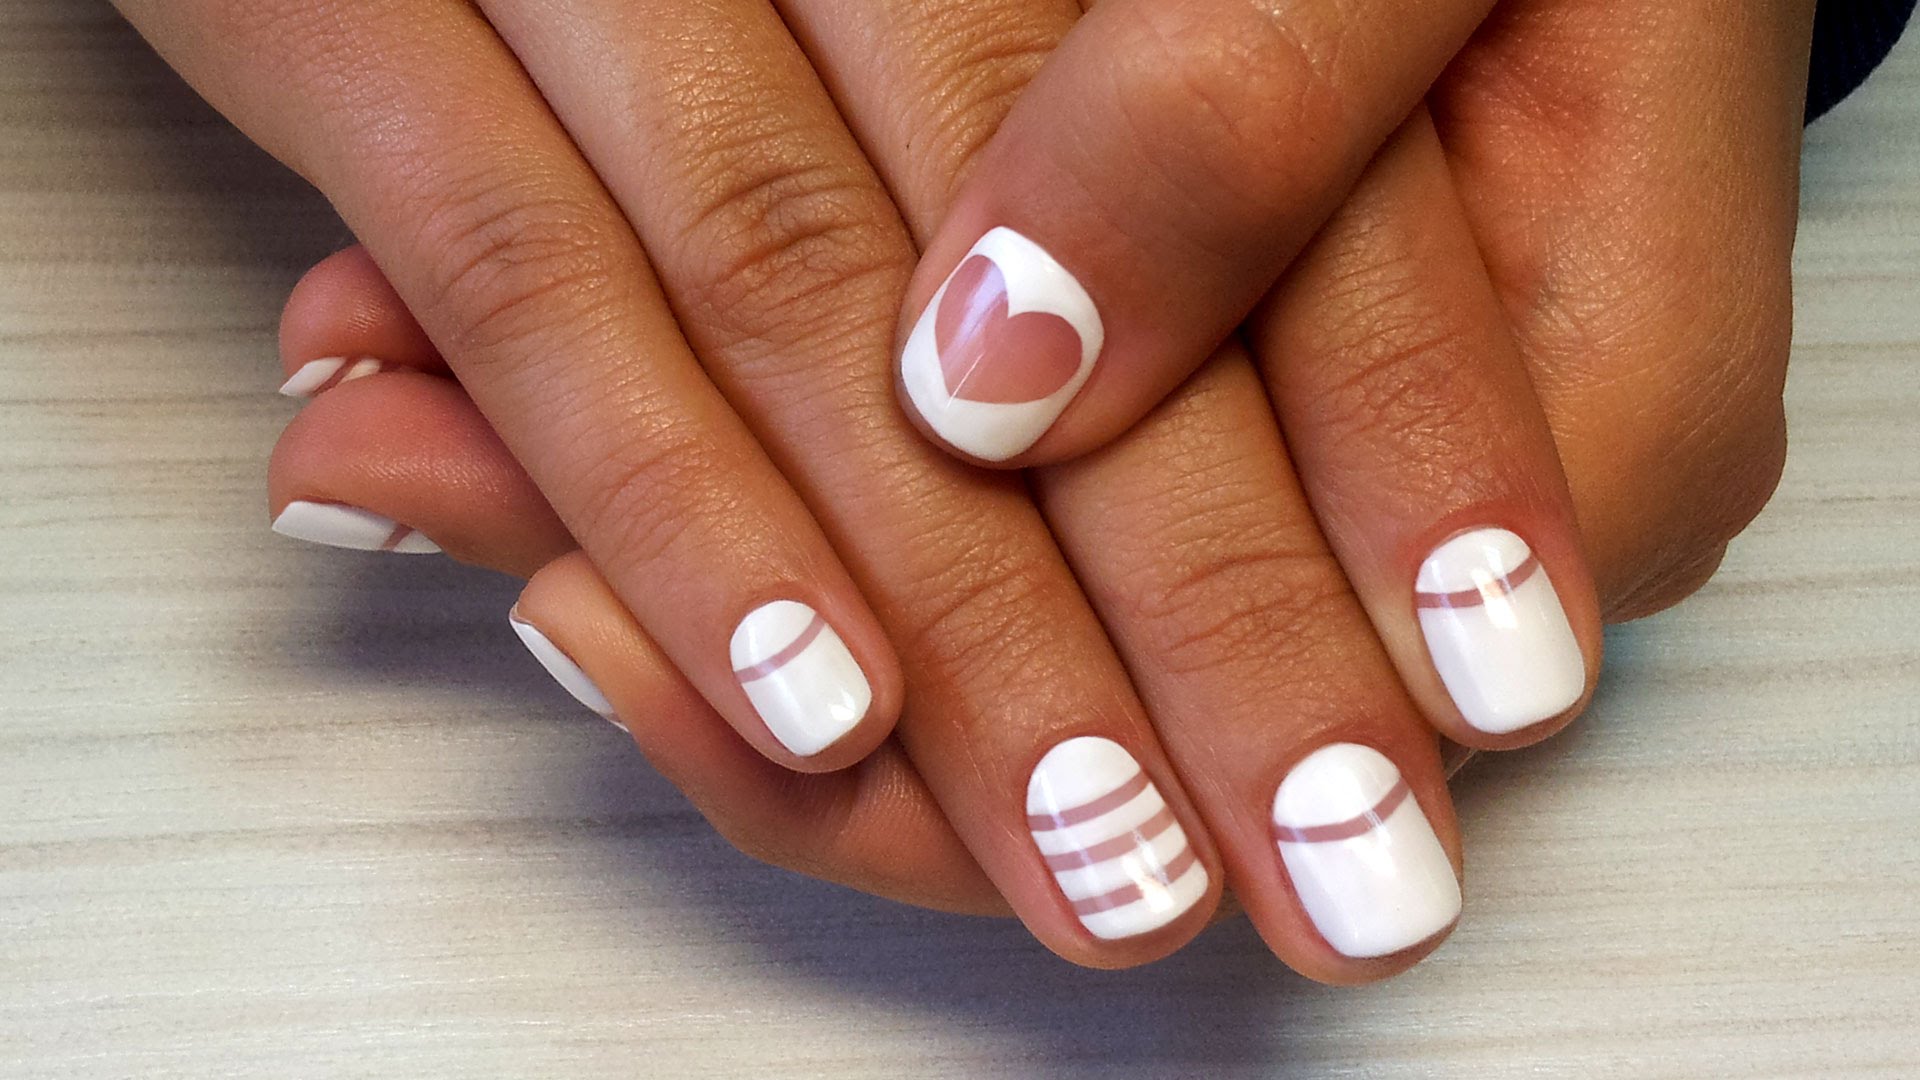
Wedding manicure design with ribbon
What is the difference between a regular manicure and a wedding one? Wedding nail designs are gentle light tones of varnish, light, airy designs. Use gold, white, silver, beige, pale pink ribbon. Most often, on the bride's hands you can see - French manicure, some frame it with shiny ribbons, others with rhinestones, beads.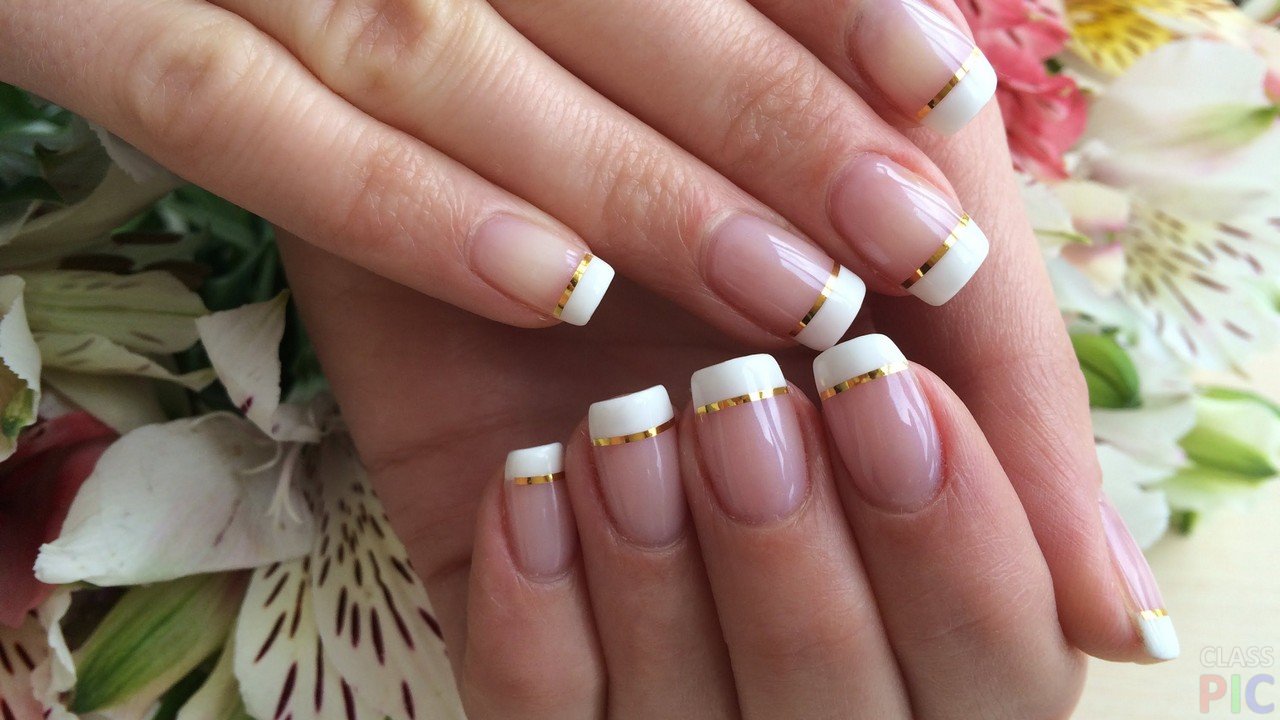
The idea of a wedding manicure depends on the desire of the bride and the capabilities of the master. The fashionable trend of decorating nails with any decor for one finger, the rest are done in the same style.
Choice of ribbon: thin, thick or curly?
Nail design tapes are commercially available in different widths and shapes. Usually tape width: 1mm, 2mm, 3mm, there are more. All ribbons with metallic sheen, different colors. There are ribbons in the form of corners, zigzags and other patterns. Also, very often craftsmen use a tape with a rough surface with glitters.
Liquid tape for nail design
Liquid tape - dries quickly, forms a dense film, protects the cuticle and skin around the nail from excess varnish. With the help of such a tape, beautiful, original drawings are created. The advantage of such a tape is that it dries quickly, is easily removed, does not leave spots on the skin and cuticle, a convenient brush or sponge, a small bottle.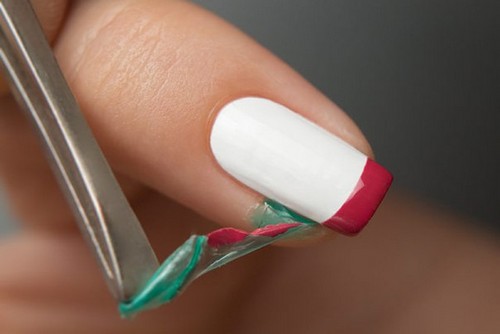
Apply liquid tape to the skin around the nail with a brush, wait 30-40 seconds to dry. They remove it by prying a little from one edge, it is elastic and easy to remove. It is well suited for airbrushing, stamping nail decoration, water, gradient manicure.
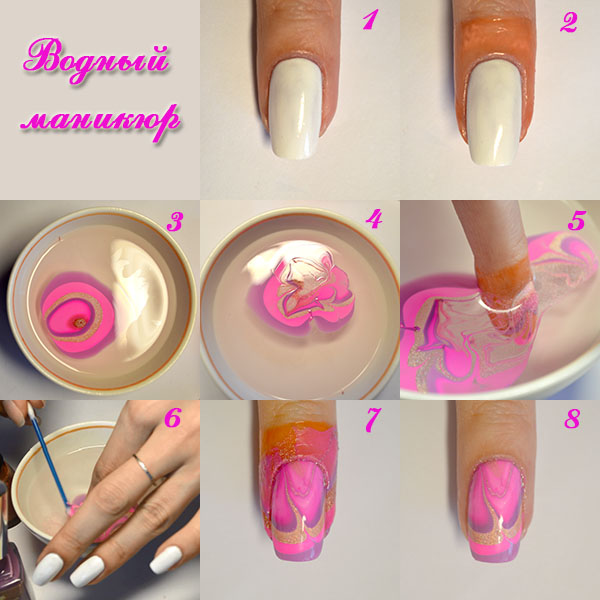
For water-based nail design, using tape is done in several stages:
- Apply base - nail polish;
- Liquid tape around the nail;
- In water, create a drawing using several colors, a thin wooden stick;

- Put your finger on the drawing;
- Pull out your finger, let dry, apply a transparent fixative;
- In this way, designs are created for each fingernail.
At home, liquid tape can be replaced with PVA glue, scotch tape, cling film.
Materials and tools for execution
Materials and tools for performing manicure and design with ribbons, each woman chooses her own set, with which she is used to working.
Basic tools:
- Bath with aromatic oils;
- Hand cream;
- Penza;
- File;
- Scissors;

- Varnish, Gel Polish, Acrylic;
- Nail lamp - to dry gel polish, acrylic;
- Napkins;
- Nail polish remover;
- Liquid tape;
- Design ribbons;
- Tweezers.
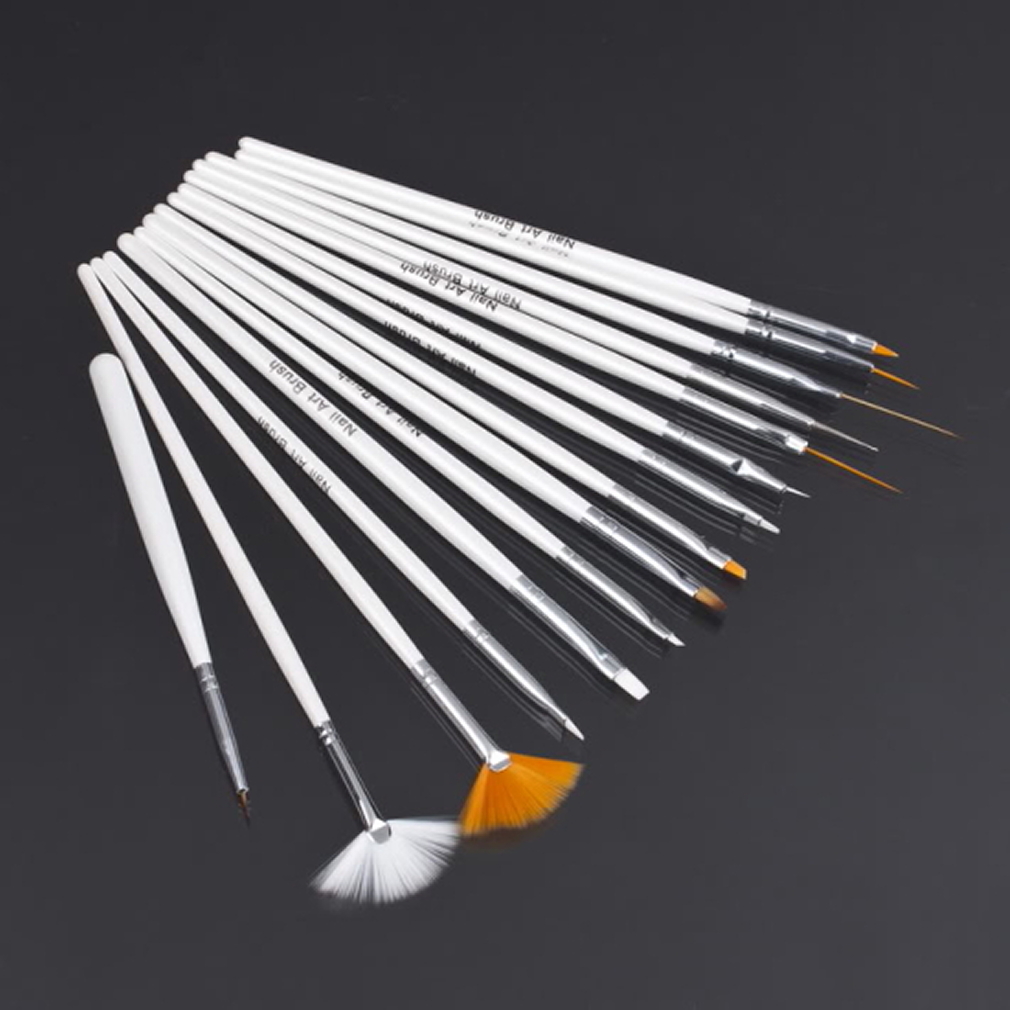
This list can be supplemented, decreased depending on the type of manicure and design.
How to design with ribbons: step by step instructions
The first steps in creating a beautiful nail design with ribbons is preparing the hands and nails:
- Make a hand bath;
- Clean and align your nails with a file;
- Treat nails with nail polish remover or alcohol;
- Apply a transparent base to nails, dry;

- Apply varnish of the selected color;
- Draw lines in white near which the tape will be glued.
- We glue the tape so that 1-1.5 mm remains to the edge of the nail, then the tape will not come off.
- We apply a fixing colorless varnish. We dry our nails and the manicure is ready.
With the advent of various tapes for nail design, every woman can create a unique, neat manicure at home, at the right time for her, and save her money.
Tape Nail Design Videos
Nail design with tape and foil:
Nail Designs with Ribbons! Abstraction on nails:
I like manicure with all sorts of multi-colored ribbons, I do it in various variations, but not always successfully.